Cream-painted furniture can instantly add sophistication and elegance to any space. I will show you the before and after pictures of some beautiful cream-painted furniture and share some tips on how to achieve a similar look.
Choose the right furniture paint
The first step in any furniture makeover project is selecting the right paint. When it comes to cream-colored furniture, there are many options out there. Some of the best paints to pick from include chalk paint, milk paint, and mineral paint. Each of these types of paint has its pros and cons, so it’s crucial to do your research before deciding on the type of paint you would like to use for your next furniture makeover. You can try General Finishes, Country Chic Paint, Dixie Belle Paint, and Fusion Mineral Paint.

Need more help with your paint type and brand selections? Read this post on Furniture paint types- How to choose the right one. This post compares the types and brands and which one will have the best results on different surfaces.
Properly prep furniture before painting
Before beginning to paint, it’s important to prepare the furniture properly. I always like to tell DIYers that you don’t build a home without the proper foundation, so don’t paint without the proper prep.
Properly prepping furniture is your furniture’s foundation.
by DeDe Designed Decor
Depending on the condition and type of furniture, the prep could be as simple as a good cleaning or very detailed by repairing, sanding, and priming.
Yes, today’s furniture paint and products make this job so much easier; however, don’t rush the prep. Sign up below to receive a copy of my detailed video training on how to prep properly. You can watch it after you see all the before and after makeovers with cream-painted furniture.
How to Prep Furniture
Paint bleed-through is another thing to consider while prepping for painting furniture white, cream, or very light colors. Another must-read is “How to eliminate paint bleed through.“
Applying cream furniture paint
Now it’s time to get to the fun part— painting! Use a good-quality paintbrush, a no-nap paint roller, or a paint sprayer to apply the paint. When applying the paint, make sure to paint a thin and even coat. Allow the paint to dry and lightly sand between paint coats with a high grit sandpaper. The sanding between coats can be eliminated if you are going for an aged layered paint finish. Sanding after each paint coat is highly recommended for a modern and smooth paint finish.
Add finishing touches to cream painted furniture
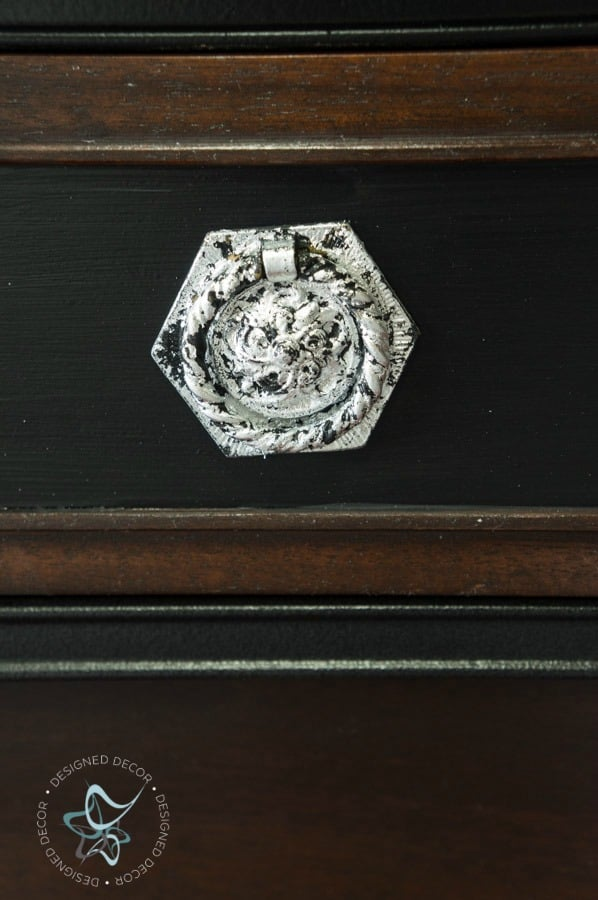
To give your cream-painted furniture that extra-special touch, consider adding some finishing touches. For example, you might want to add some distressing to create a shabby chic look. Or, add some decorative stenciling to create a unique and personalized effect. You may also consider wet or powder glazing for an antique look. Don’t forget to give the hardware an update by replacing it with new hardware or painting the existing ones. Finish it up with some wax or a clear top coat sealant to protect the furniture and enhance the paint’s durability.
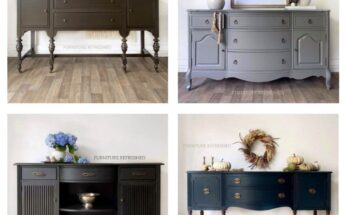
Check out these cream painted furniture before and after transformations
To show you just how gorgeous cream-painted furniture makeovers can be, I have rounded up some before and after transformations. From dresser makeovers to table and chair overhauls, these photos will give you some serious inspiration. Check out these cream-painted furniture makeovers, and get ready to start your project today!
Scalloped side table makeover
This antique scalloped side table was a great piece for an easy makeover. I loved the spindle legs and the scalloped-shaped tabletop. I found it at a thrift store for a great price of $50.
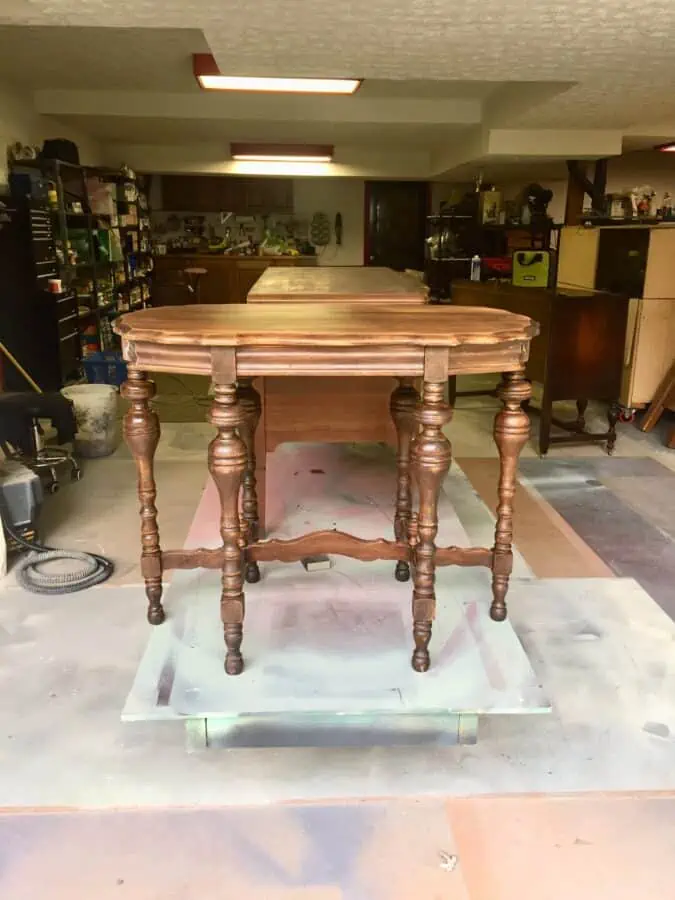
When I know that I will be painting any dark cherry-stained pieces in a light color, I always decide to prime the table base before painting. This decision comes from experience, and it saves me time in the long run instead of having to go back and redo it once I discover paint bleed through.
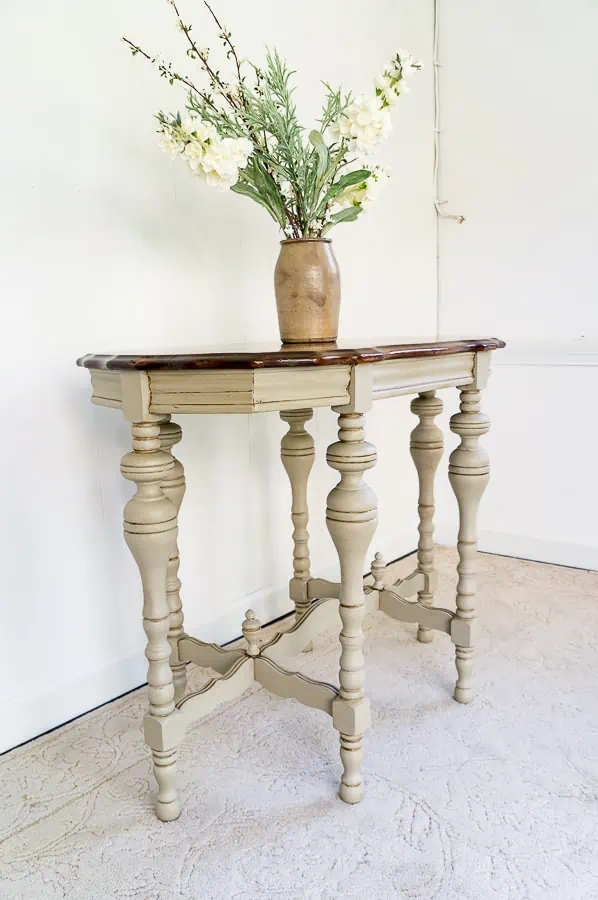
I did my favorite gel stain on furniture without stripping for the tabletop. The base was painted in Linen, glazed with smokey quartz, and sealed with high-performance flat.
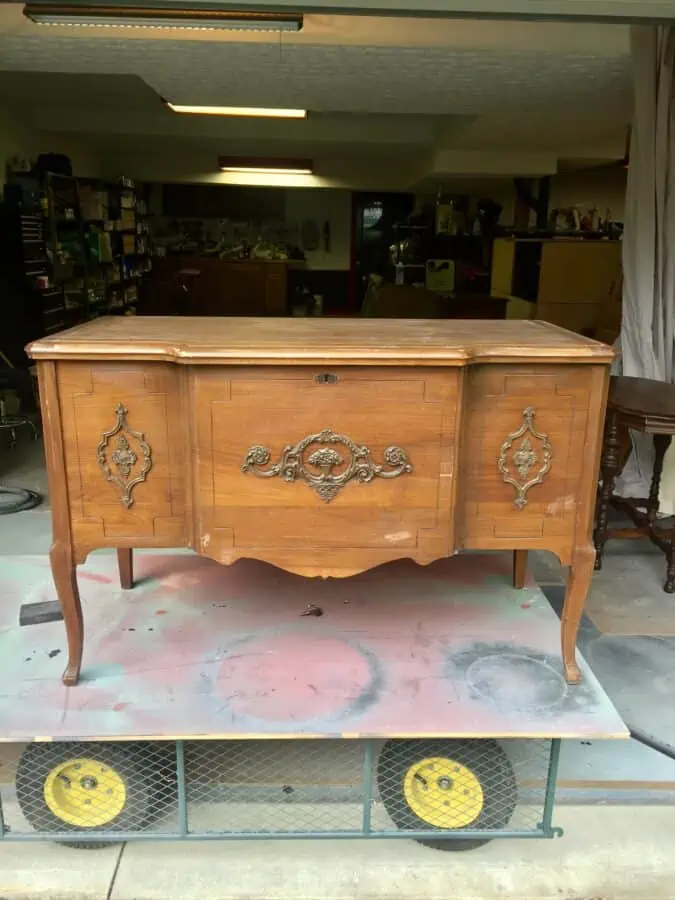
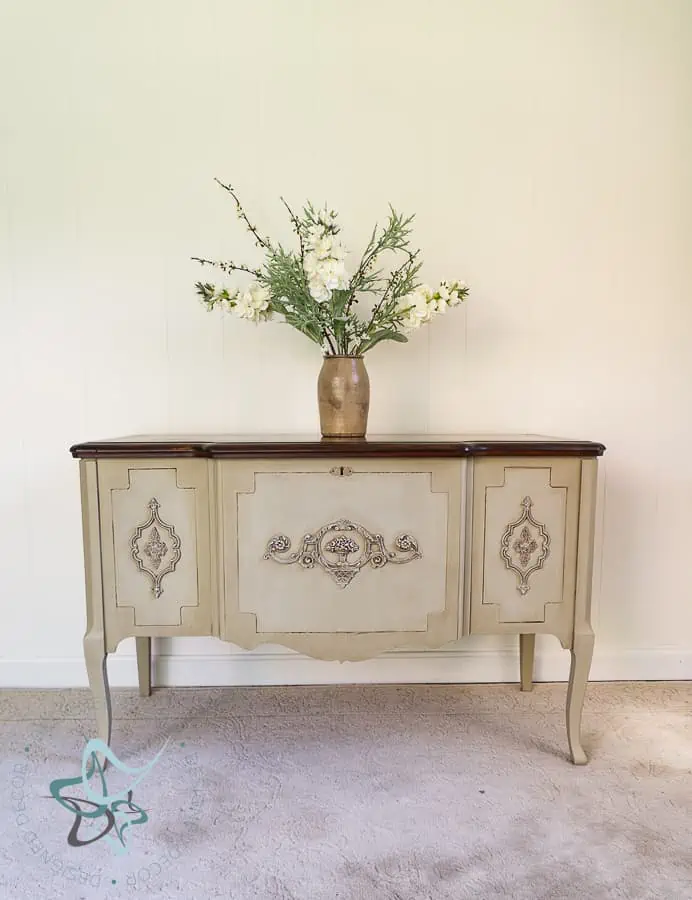
Antique sewing cabinet turned entryway table
This antique sewing cabinet has seen better days and was in desperate need of a new life. The sewing machine had been removed, and the top was sealed closed.
It was poorly painted by someone else, so I needed to sand it down to remove the paint drips and peeling paint.
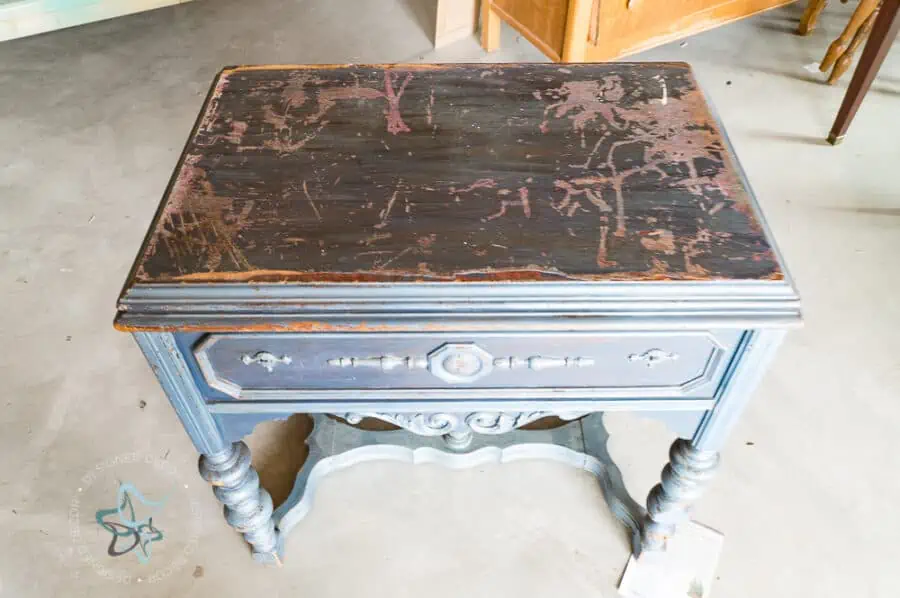
Since it had other layers of paint and many areas that I could not sand out for a smooth finish. This sewing cabinet was the perfect candidate for a shabby paint finish. You must work with what you have and not make the makeover harder than needed.
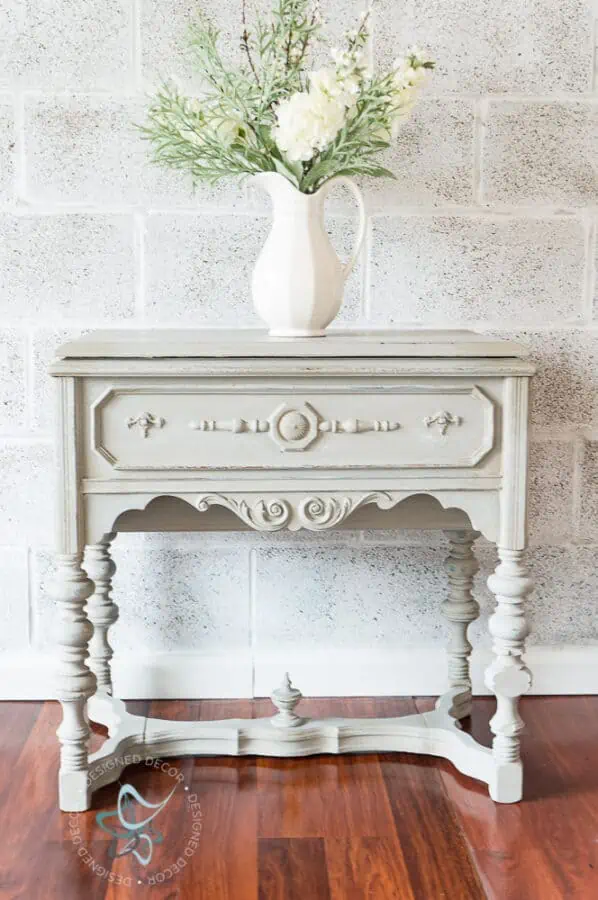
She was painted in vanilla frosting, and I used a dry brushing technique with simplicity over the top of the vanilla frosting paint color. I also hand-distressed it with a sanding block to allow some of the wood and blue paint to show through. I sealed it with clear furniture wax and used antiquing wax in places to give the finish a deeper aged look.
Antique dresser set makeover
This old dresser set turned out to be a real beauties! They were in decent shape on the body, however, the tops needed sanding. I love the look of keeping some of the original wood with paint. It gives the piece of furniture more charm with a modern look.
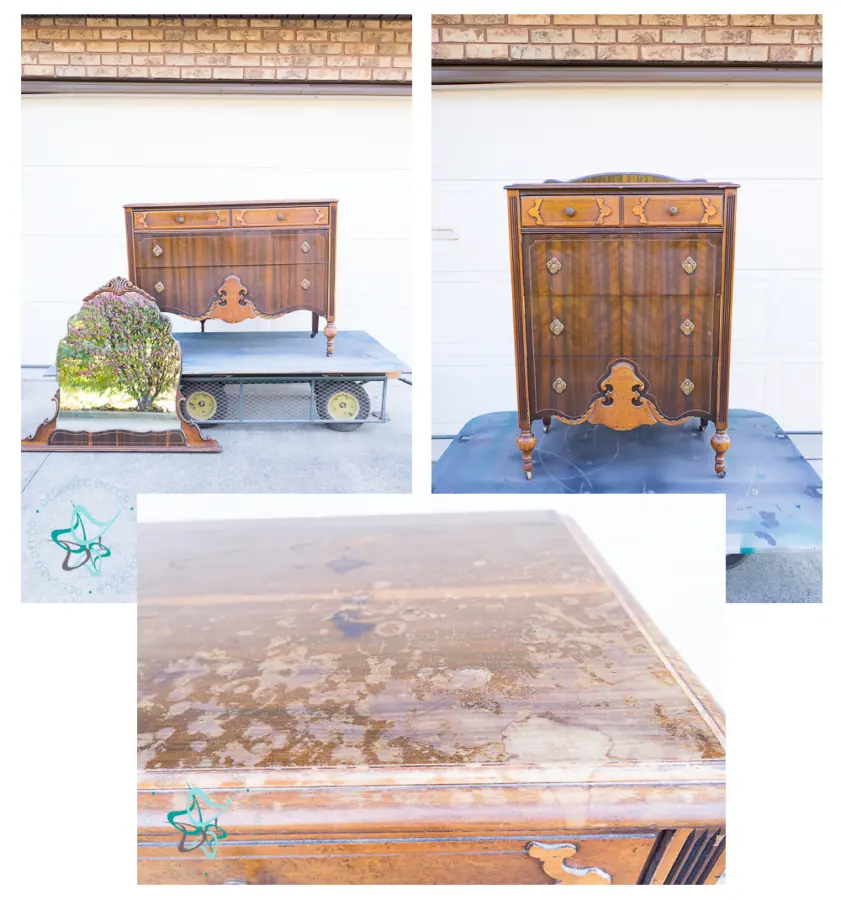
The tops were sanded down, and I restored the wood with an antique walnut gel stain. I used the gel stain over the existing wood legs, the top drawer, and the detailed wood on the drawer bottoms. The gel stain gives some life back to the wood. After the stain had completely dried, I sealed it with my favorite wipe-on poly.
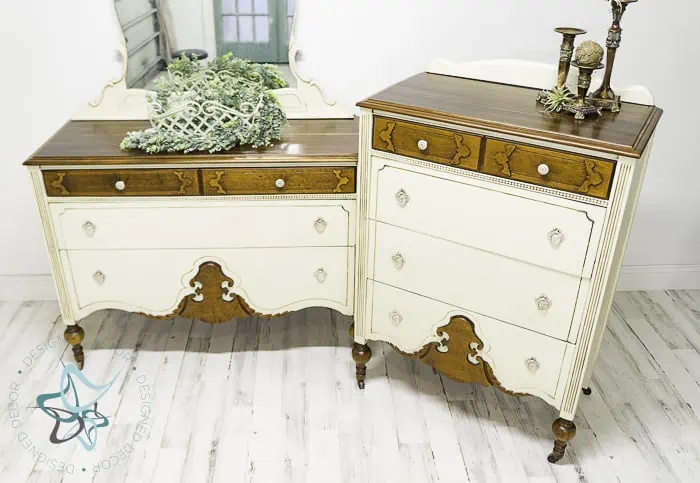
All the finished wood was taped off so I could spray on primer and the linen furniture paint. A smoky brown glaze was used and sealed with high-performance flat.
Vintage blanket chest makeover
This vintage blanket chest was a rare find. It is hard to find one with such details. This turned out to be a beautiful furniture makeover and one that I wanted to keep.
The top was finished with Java gel stain using the no-stripping method. The entire piece (base) was painted with vanilla frosting. I used the antiquing wax to add aging except for the areas within the carved details on the front. I did dry brushing with white furniture paint to accent the raised carved details and sealed that area with clear wax.
Other cream painted furniture favorite makeovers
Cream-painted furniture may seem intimidating at first, but with the best paint, the right antique furniture pieces, and a fresh coat of paint, it can be something you are proud to display in your home. Remember, prep work is crucial, so take your time and invest in good-quality paint. Check out some before-and-after pictures for inspiration, and don’t be afraid to add some finishing touches to make your old furniture truly unique. With these tips, you’ll be completing your first furniture makeover and painting like a pro in no time!